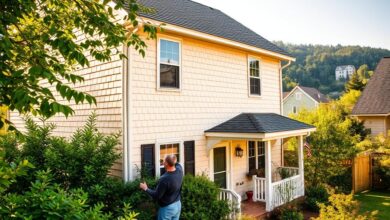
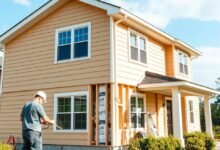
Improving your home’s energy efficiency can save you money on bills and make it look better. Installing insulated siding is a smart choice. It keeps your home warm and protects it from the weather.
Choosing the right insulated siding can be tough. This guide will show you how to install insulated siding. You’ll learn how to make a choice and get great results.


Key Takeaways
- Understand the benefits of insulated siding for your home.
- Learn about the different types of insulated siding available.
- Follow a step-by-step guide to installing insulated siding.
- Discover tips for achieving a professional finish.
- Understand how insulated siding can improve your home’s energy efficiency.
Understanding Insulated Siding: Benefits and Product Options
Insulated siding has changed how we renovate homes. It combines energy savings with lasting durability. This siding makes homes more comfortable and cuts down on energy use.
What Makes Insulated Siding Different
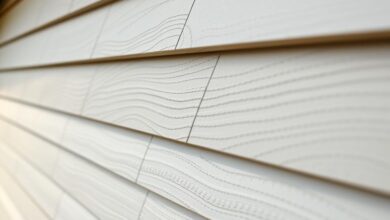
Insulated siding stands out because of its design. It has a foam backing that boosts its thermal performance. This design helps reduce heat transfer, keeping homes cozy in winter and cool in summer.
Energy Efficiency and R-Value Considerations
The energy-saving aspect of insulated siding depends on its R-value. The R-value shows how well it blocks heat flow. A higher R-value means better insulation. Homeowners should look at the R-value when picking insulated siding to meet their energy needs.
Top Insulated Siding Brands on the Market
The market has many insulated siding options from well-known brands. Vinyl and fiber cement insulated siding are two of the most sought-after types.
Vinyl Insulated Siding Products
Vinyl insulated siding is loved for its durability and easy upkeep. CertainTeed and Mastic are top brands that offer quality vinyl insulated siding. Their products can handle different weather conditions.
Fiber Cement Insulated Options
Fiber cement insulated siding is also a good choice. It’s strong and resists pests and fire. ProVia is a brand known for its fiber cement insulated siding. It has features that improve energy efficiency.
When deciding between vinyl and fiber cement, think about your budget, how durable you want it, and your style preferences. This will help you make a smart choice.
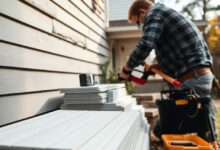
Tools and Materials Needed for Insulated Siding Installation
To install insulated siding smoothly, you need the right tools and materials. This DIY project is easy if you have the right gear and know what to do.
Essential Tools Checklist
Having the right tools is key for a good insulated siding installation. You’ll need a utility knife for cutting panels, a measuring tape for precise measurements, and a circular saw for straight cuts. A drill with screwdriver bits is needed to secure the siding.
A level ensures the panels are straight, and a chalk line marks the wall for the first row. Don’t forget a ladder or scaffolding for safe access.
- Utility knife
- Measuring tape
- Circular saw
- Drill with screwdriver bits
- Level
- Chalk line
- Ladder or scaffolding
Quality Materials for Lasting Results
Choosing high-quality materials is important for your siding’s durability and performance. The siding panels should be durable and weather-resistant. You’ll also need a weather-resistant barrier (WRB) to keep moisture out.
Fasteners should resist corrosion for a long-lasting installation. Adding a high-quality underlayment material provides extra protection against the elements.

Safety Equipment Requirements
Safety is the most important thing when installing insulated siding. Wear protective gloves to avoid injuries from sharp edges and tools. Safety glasses protect your eyes from debris.
When working at heights, use a sturdy ladder or scaffolding. Having a spotter is a good idea for extra safety. Dust masks are useful when cutting materials to avoid inhaling dust.
With the right tools, quality materials, and safety equipment, you’re ready to start your insulated siding installation project with confidence.
How to Install Insulated Siding: Step-by-Step Process
Installing insulated siding well needs careful planning and following the best steps. Mark Johnson, a seasoned contractor, said, “The key to a flawless insulated siding installation lies in the preparation and attention to detail.” This guide will help you through the process, making sure your project goes smoothly and well.
Preparing Your Home’s Exterior
Before you start, get your home’s exterior ready. This means taking off the old siding, checking the sheathing for damage, and fixing it if needed. Make sure the surface is clean, dry, and free of debris. As “a clean slate is key for a successful installation”, take your time to inspect and prepare well.
Take off the old siding carefully so you don’t hurt the sheathing underneath. Check the sheathing for rot, mold, or damage. Fix any problems to have a strong base for your new siding.
Measuring and Cutting Insulated Panels
Getting the measurements right is important when cutting panels for windows, doors, and other spots. Measure each part of your home’s outside carefully, noting any special cuts needed. Use a sharp utility knife or circular saw for precise cuts.
Remember these tips when measuring: measure twice for accuracy, think about any blocks like vents or outlets, and cut panels a bit bigger than needed for a good fit.
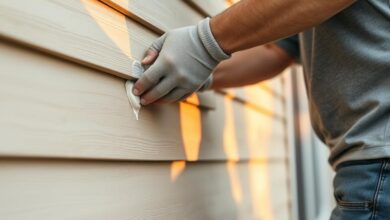
Proper Installation Techniques
Using the right installation methods is key for a good insulated siding job. Start by lining up the first panel with the manufacturer’s guide, usually the wall’s bottom edge. Use the right fasteners to secure it, making sure it’s watertight.
“The most critical aspect of insulated siding installation is ensuring a watertight seal. This not only improves energy efficiency but also protects the home from water damage.”
Keep installing panels, following the manufacturer’s overlap guide for a tight seal. Use a level to keep the panels straight and aligned.
Finishing Touches and Trim Work
The last step is adding finishing touches and trim. Put trim around windows, doors, and other spots for a smooth look. Make sure all edges are sealed to keep water out.
Seal any gaps or seams with quality caulk, and add finishing trim to hide exposed edges. This not only looks better but also adds extra protection against the weather.
Product-Specific Installation Tips and Considerations
Installing insulated siding isn’t the same for all products. Brands like ProVia, CertainTeed, and Mastic have their own needs. Knowing these differences is key to a job well done.
ProVia Insulated Siding Installation
ProVia siding stands out for its quality and design. It’s important to follow the maker’s instructions closely. This includes how to fasten it and what underlayment to use.
ProVia’s foam-backed siding is great for keeping your home warm. But, it needs careful handling to avoid damage. Make sure to seal it well around windows and doors for best energy savings.
CertainTeed and Mastic Installation Differences
CertainTeed and Mastic have their own ways of being installed. CertainTeed needs a special fastening to studs, while Mastic might use something else. Knowing these differences is important to avoid mistakes.
When installing CertainTeed, align it with the studs for strength. For Mastic, follow the underlayment advice for the best results.
| Brand | Fastening System | Underlayment Recommendation |
|---|---|---|
| ProVia | Manufacturer-specific fastening pattern | Required for optimal performance |
| CertainTeed | Nailing flange secured to wall studs | Recommended for improved energy efficiency |
| Mastic | Unique fastening system | Manufacturer-specific underlayment required |
Budget-Friendly Options and Their Installation Challenges
For those watching their budget, there are cheaper insulated siding options. But, they might be harder to install and not as energy-efficient.
When choosing a cheaper option, check the material and instructions. These might save money upfront but could cost more in the long run.
In conclusion, knowing how to install your chosen insulated siding is key. Follow the manufacturer’s guidelines and understand your siding’s unique features. This way, you’ll get a quality finish that saves energy and looks good.
Conclusion
Installing insulated siding is a big step in making your home better. It makes your home more energy-efficient, durable, and looks great. By picking the right materials and following the right steps, you’ll have a cozy and green home.
Whether you like to DIY or need a pro, the secret to great insulated siding is in the details. Companies like ProVia and CertainTeed have products that fit your needs. Your new siding will save you money on energy and make your home look better, increasing its value.